From the
University of California Division of Agriculture and Natural Resources
by the Sonoma County Master Gardeners
Drip Irrigation
Basics
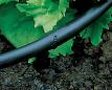
Drip irrigation works by placing water slowly and directly into the
soil—literally “dripping” it in from the
many small
water emitters which are placed one or more at each plant, or emitter
line which is snaked around the planted bed. Drip is also excellent for
watering sloped gardens because the slow rate of water applied through
drip irrigation means it is more likely to soak in before it runs off.
Basic Elements

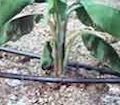
PC Emitter
Basic
drip systems consist either of individual water emitters connected by
¼” feeder tubing to 5/8” polyethylene
main line
tubing, or 5/8” tubing with emitters ‘built
in’ at
measured intervals. Either system is in turn connected to a water
source. This can be a hose bib, a manual valve, or an electric valve
controlled by an irrigation controller. Emitters are small plastic
parts that ‘emit’ controlled amounts of water. They
can be
drippers, or micro-sprayers, or micro-bubblers, or lengths of emitter
line which have water drippers every few inches. They are normally
calibrated in gallons per hour, or gph, and standard sizes come in
½ gph, 1 gph, 2 gph, and more.
Installation of a basic,
simple drip system is quite straightforward, and easily within the
grasp of most home gardeners. It goes together much like a tubular
erector set--all snapping together. Main 5/8 inch lines slip into
fittings on the water source (if you’re on well water, you
need a
filter on the water source). If you are using ; ¼" feeder tubes,
these slip onto barbed fittings that poke into the main lines; "tee"
and "el" fittings allow feeder branches to go to individual plants;
continuous emitter lines snap/poke in like feeder tube then snake
through areas of denser planting. The 5/8” in-line emitter
tubing
works similarly; you snake it through your beds or construct circles
around shrubs and trees that you then connect with regular main lines.
Inline emitter line
If
you already have an above-ground pressurized system, it is very simple,
with a couple of plastic parts, to convert it to a drip system. So if
you’re thinking of reducing some of your lawn, for example,
and
you already have a system that automatically waters, you’ve
got
the controller and underground piping for a drip system!
Advice
from representatives at outlets that sell drip equipment, ranging from
Friedman's to Home Depot to your local hardware store to specialist
firms such as Harmony Farms in Sebastopol, Watersavers in Petaluma and
Wyatt Irrigation Supplies in Santa Rosa can assist you, and make a DIY
job feasible. Also, an excellent primer is Drip Irrigation in the Home
Landscape, available from the University of California Agriculture and
Natural Resources (Publication 21579-http://anrcatalog.ucdavis.edu/).
An excellent book on drip is Drip Irrigation for Every Landscape, by
Robert Kourik.
Emitter Line
Water Zones
Whether
you install a simple, hand-activated system, or a more complex
automatic system, one key element of drip irrigation design is
zoning—sometimes called hydrozoning. What this basically
means is
dividing the irrigation system into areas, zones and putting plants
with similar water needs on their own zones. For example, you might
have all pots on a sunny deck, which need water daily, or perhaps
twice, on one zone. Shrubs that need weekly, or twice weekly watering
would go on another zone. Trees which need less frequent, but longer
watering on yet another. Sunny and shady areas might go on different
zones.
Dealing with
the Disadvantages, Maintenance and Monitoring
You
should visually monitor the system regularly. If you don’t,
you
won’t know that the system is not working until plants die or
show severe water stress. Lines break, tube pulls away from fittings,
shovels make unknown cuts, emitters plug. Look and listen for geysers,
spouts, leaks, large wet areas, etc. Also monitor the health of your
plants for signs of too little or too much water. You should of course
do this anyway. Check the soil periodically for correct moisture. You
also need to learn basic repairs and keep a toolbox of useful repair
parts and tools: wire cutting pliers, regular pliers, hole punch,
sturdy scissors, various connectors, sprayer heads, emitters, bubblers,
emitter tubing, goof plugs, etc. But don’t be concerned if
you
are not mechanically minded – this stuff really is pretty
easy to
understand.
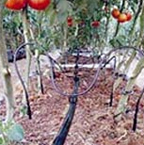
Vegetables dripped
Over
time, you will need to adjust your system, to reduce water to some
plants, and increase it to others. Gardens are constantly changing:
plants die and must be replaced; new sections are added; plants grow,
and need more water. The drip irrigation systems has to change as well,
in order to maintain maximum efficiency in the use of water.
While
involving some time, effort and cost, a properly designed and installed
drip irrigation system will both save considerable water and money, and
make the job of watering the garden easier.
Back
to
Drip
Irrigation Page
|
© Sonoma County Master Gardeners
|