From Aggie
Horticulture, Texas A&M AgriLife Extension, Texas A&M
University
System
by Larry A. Stein, Ph.D. and Julian W. Sauls, Ph.D. Professor and Extension Horticulturists
Texas Inlay Bark Graft
Inlay grafting is one of the best and most popular systems of
propagating pecans in Texas. It has been successfully used when other
systems have failed because of heat, drought and wind. It has also been
successfully used on walnuts, apples, pears, grapes, rabbiteye
blueberries, persimmons, citrus, avocados and mangos.
The Texas
method of inlay grafting, developed by B.G. Sitton, L.D. Romberg, F.R.
Brison, B.G. Hancock and others in the 1950's, follows the basic
fundamentals of the standard bark graft. However, this technique uses
an inlay cut and employs an entirely new system of covering the graft
and stock. The inlay occurs when two parallel cuts are made through the
stock bark forming a scion inlay pattern on the stock. Aluminum foil is
used as a stock cover, reflecting sunlight and reducing temperatures
around the graft. The foil is covered with polyethylene film to assure
constant high relative humidity around the graft. This system not only
results in a high percentage of growing grafts, but it is easy to use.
The more stressful the grafting conditions, the more important this
grafting technique becomes.
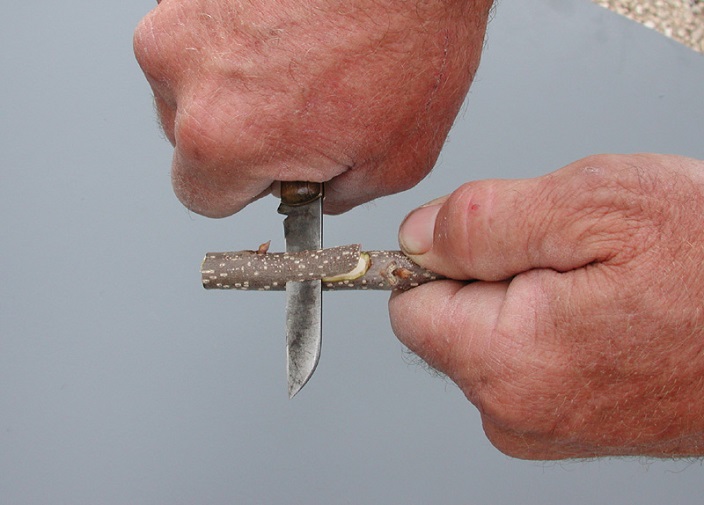
The ideal time to inlay graft is in
early spring to about the end of May. Although the technique can be
used into the summer, success is limited due to increasing heat. Bark
slippage is a must for inlay grafting, which is usually indicated by
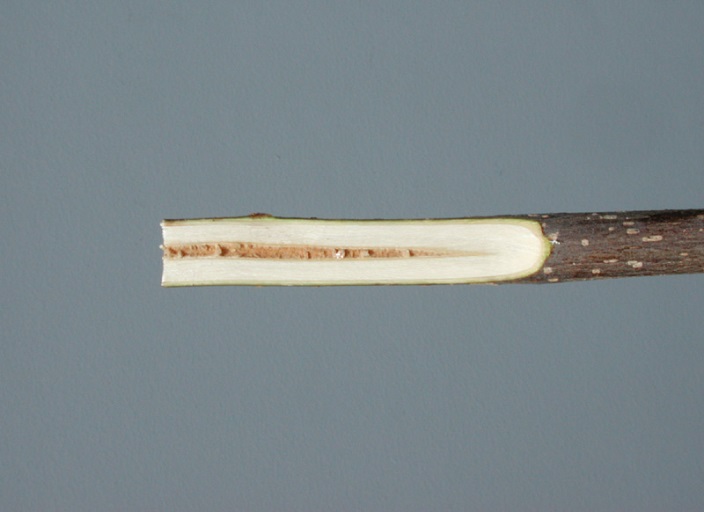
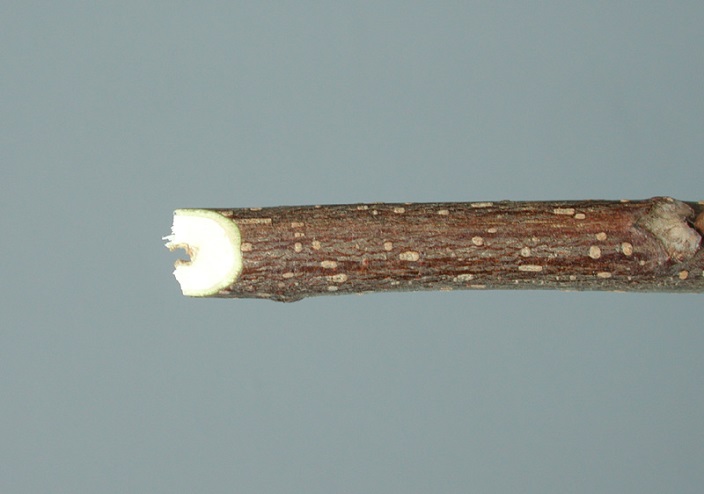
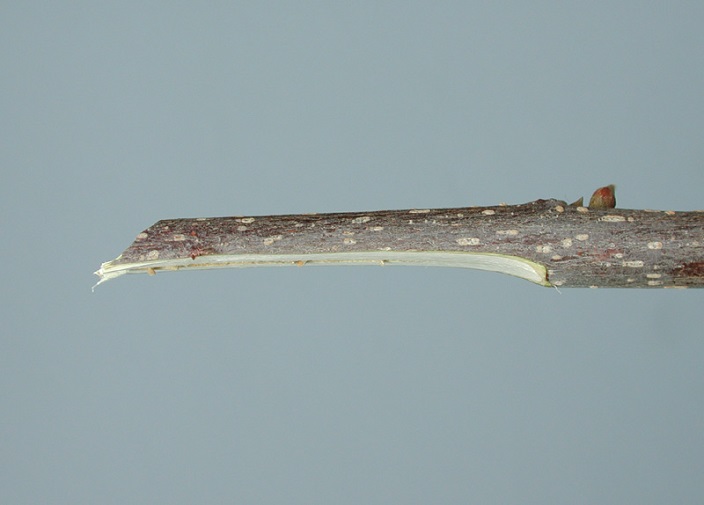
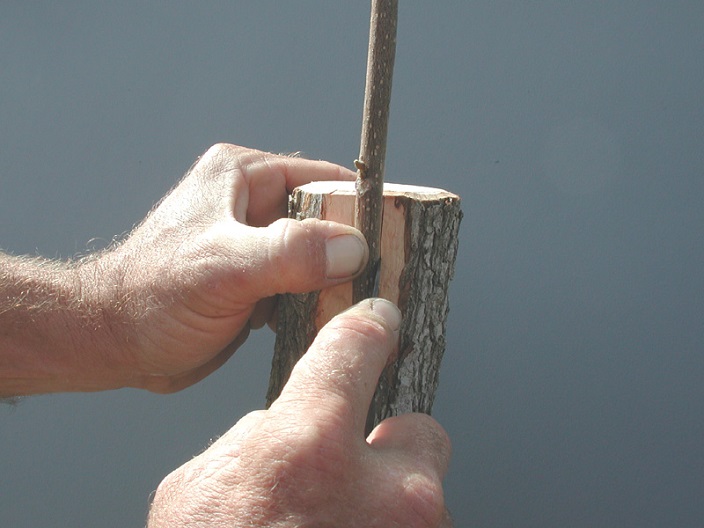
tree growth and leaves. To ascertain that the bark is slipping, select
a point above where you anticipate inserting the graft. Make a narrow,
V-shaped pair of cuts completely through the bark, then use the knife
point to lift the bark inside the point of the V. Gently peel the bark
up and away from the wood--if it comes cleanly and easily, the bark is
slipping and you can proceed with the graft. If not, wait a week or so
and check again.
Anyone can successfully use the inlay graft by
following these instructions and practicing to develop skill in the
basic techniques. The key is to practice, as you may be "all thumbs"
the first few times you try to graft. In this presentation, 32 images
are included to illustrate the finer points of the technique. Each
image is shown with the text as a thumbnail version for speed of
downloading. Click on the thumbnail image to see it as a full screen
version, then click "Back" to return to the text and thumbnails.
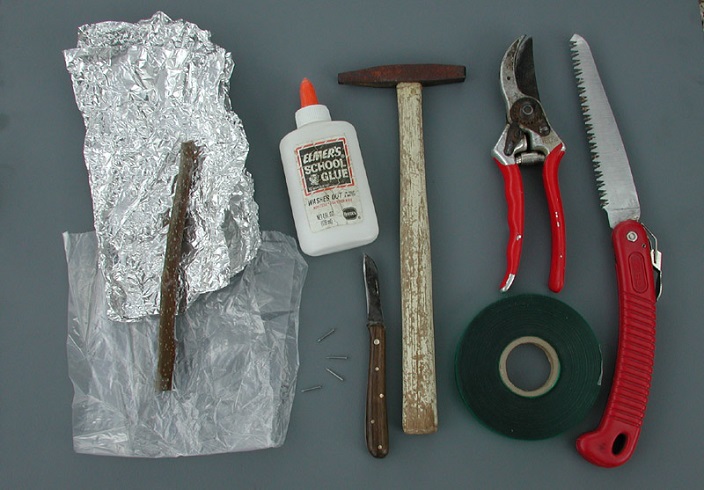
 |  | Fig. 1 
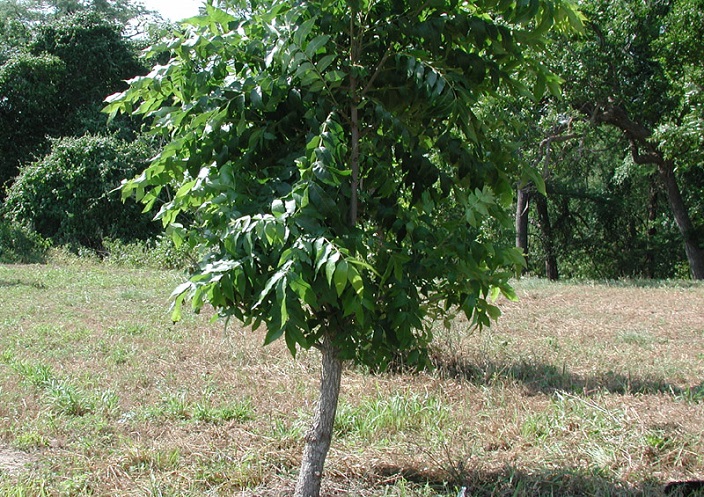
Materials and tools commonly used in pecan propagation | Fig. 2
Seedling pecan tree to be grafted |
Necessary
equipment includes dormant graftwood, aluminum foil, polyethylene bags,
a sharp knife, 18 gauge 3/4-inch nails, hammer, budding tape, shears,
saw and glue. All necessary equipment can be carried in an apron.
Use
rootstock trunks or major side limbs that are 1 to 3 inches in
diameter. On larger trees, leave one or two side branches below the
graft to keep the tree vigorous, to protect from sunburn and to keep
the graft from overgrowing and blowing out, as blow outs seem to be
more common on larger trees than on smaller ones.

| 
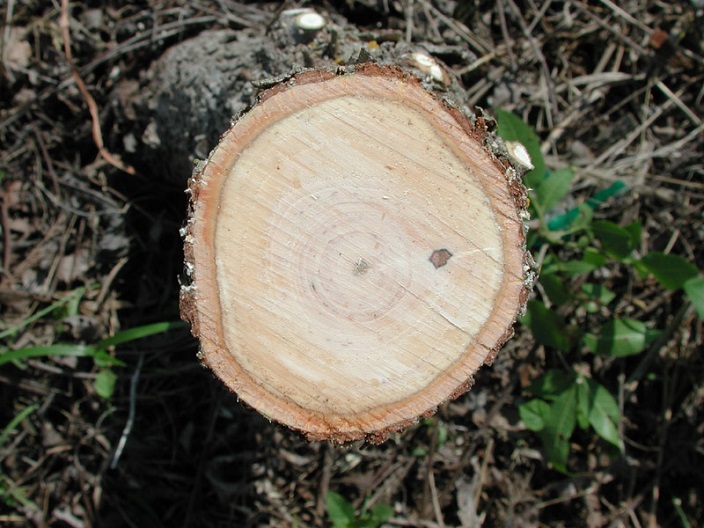
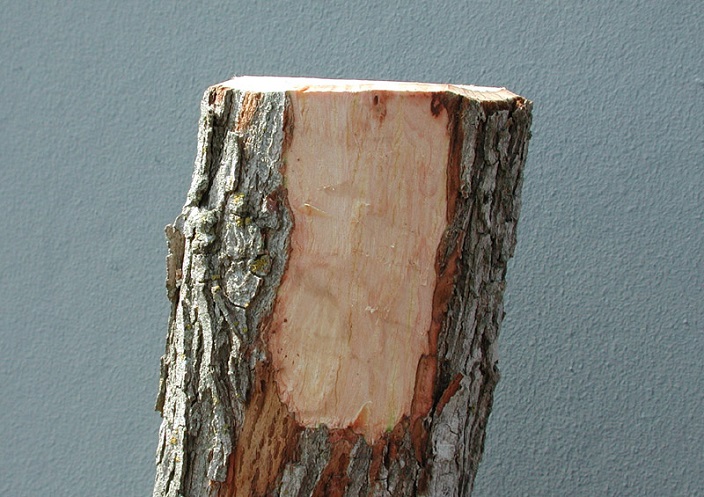
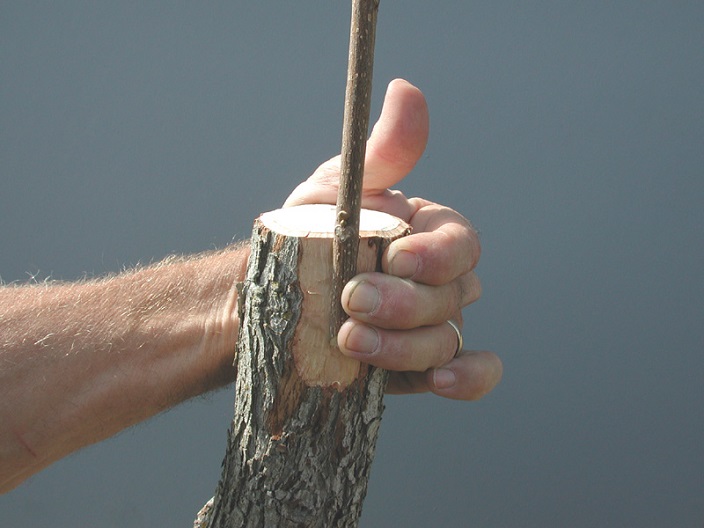
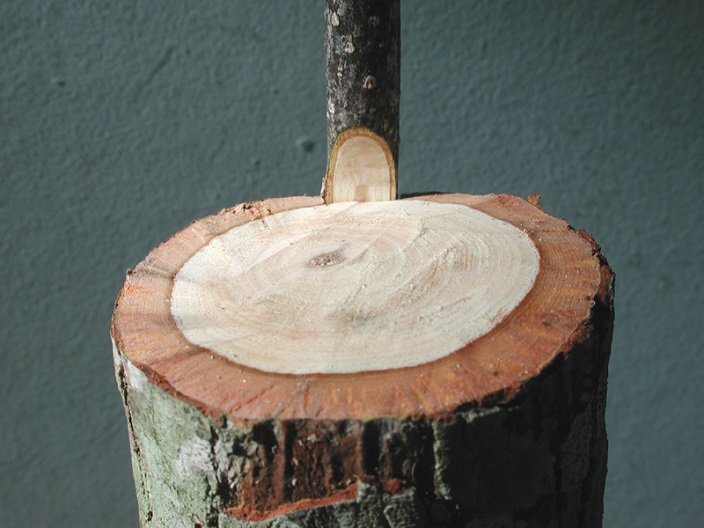
| Fig. 3
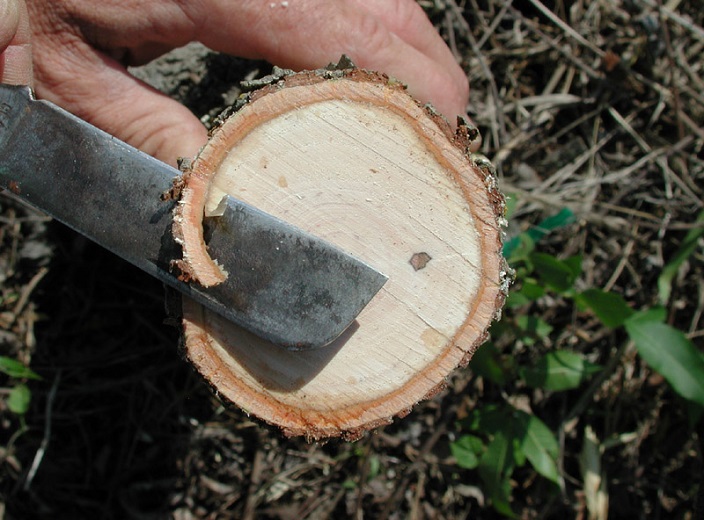
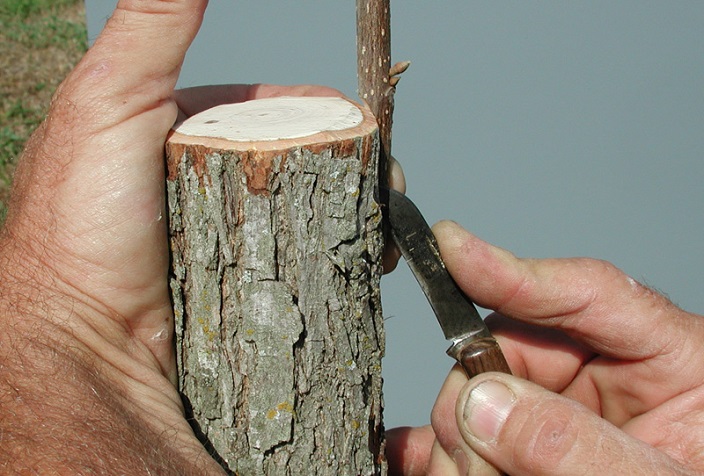
Top view of stock showing flat side at left | Fig. 4
Trimming the stock cut
|
Cut
straight across the trunk or limb with a sharp saw above a smooth, even
section of the trunk or limb. Make the cut 7 or 8 feet above ground if
livestock or deer have access to the trees. Select a section of stock
with a flat surface so that the flat side of the graft stick will fit
snugly in the inlay without air space separation. If possible, choose a
flat spot on the south or southwest side so that prevailing winds will
blow the graft shoot toward the trunk instead of away from it. If there
is not a suitably flat surface at the cut, you can always cut the stock
off again a few inches further down.
General clean up of the saw
cut can be made with a knife. This is always done when a chain saw is
used to cut off the tree top or limb. Normally this clean up is
performed all around the stock, but it can be limited to just the area
where the graft will be placed.

| 
| Fig. 5
Rough bark pared down for grafting
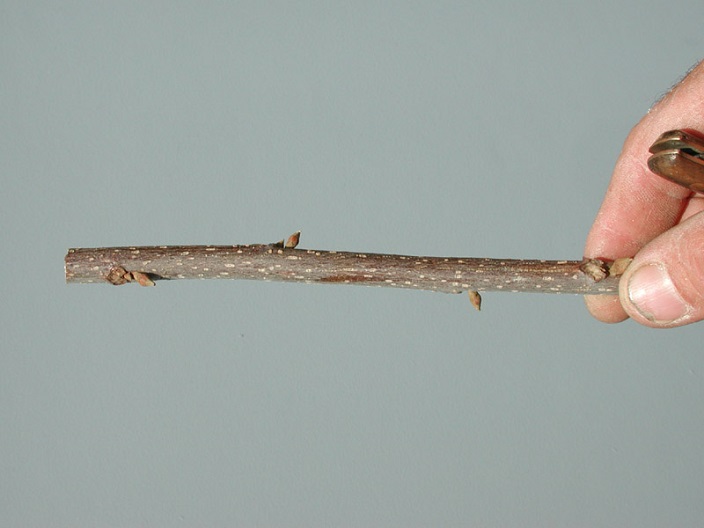
| Fig. 6
Typical pecan graft stick
|
If
the bark is rough, pare it down to live bark, forming a clean shield.
Leave the bark as thick as possible to securely hold the graft. Do not
cut into the wood.
A smooth, straight graft stick with 3 or 4
plump buds should be selected. The size of the graft wood should be
selected for the size of the stock to be grafted. Use 3/8-inch diameter
graft wood for trees up to about 2 inches in diameter, and 1/2-inch
diameter graft wood for larger trees.

| 
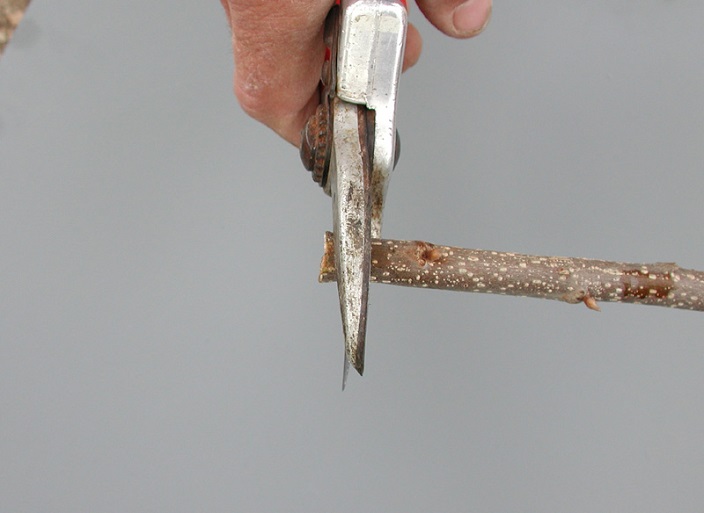
| Fig. 7
Cut off the base of the graft stick
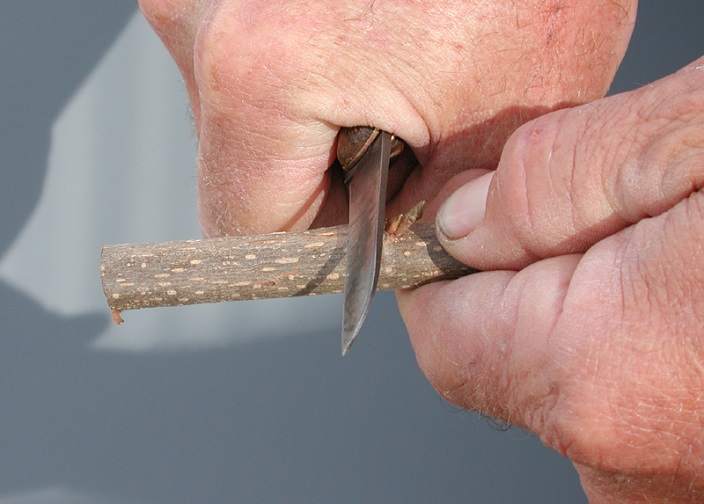
| Fig. 8
Beginning the long cut on the graft stick
|
The
end of the base of the graft stick should be cut off before preparing
the scion (graft) for placement on the tree, regardless of whether the
wood was sealed with wax or shellac.
Use a knife with a very
sharp blade similar to that illustrated. Grafting knife blades are
beveled on only one side so as to enable making a flat cut. Firmly hold
the knife in a closed fist. Start just below the insurance bud or the
lowest bud on the graft stick and cut the graft stick with several
long, thin slices to reach the center of the stick. The finished graft
stick will have one to three buds and three cuts; a slant cut, a long
cut and a back cut.
The slant cut should begin 1/2 inch below
and on the side opposite the lowest bud. It should extend half the
distance through the graft stick at approximately a 45 degree angle.

| 
| Fig. 9
Halfway through the long cut
| Fig. 10
Completed long cut
|
The
long cut is essentially right down the middle of the wood between the
slant cut and the end of the graft stick. It must be perfectly flat at
the center of the graft stick and 1.5 to 3 inches long.

| 
| Fig. 11
The back or chisel cut
| Fig. 12
Side view of the finished scion
|
The
back cut creates a chisel-shaped point about half an inch long on the
opposite side and lower end of the graft stick. This makes it easier to
insert the graft stick and provides additional cambial contact.
Making
the inlay cuts on the stock while holding the graft stick firmly
against it requires a little practice, as your thumb or fingertips
cannot extend completely across the graft stick on the side that is
being cut. To do so invites serious injury to your fingers and results
in poorly made inlay cuts. The beginner should practice this maneuver a
few times without the knife before attempting the inlay cuts.

|  | Fig. 13
Beginning the right inlay cut
| Fig. 14
Crossing over to make the left inlay cut
|
Place
the surface of the long cut of the graft stick upright against the
clean shield of live bark on the stock, with the slant cut positioned
completely above the stock. Firmly hold the graft upright in place with
the left thumb and begin the first inlay cut at the top of the stock on
the right side of the graft stick. Draw the knife straight down the
stock along the right edge of the graft stick to within half inch of
the bottom of the graft stick, cutting completely through the bark and
into the wood. It is very important to make this cut straight into the
bark without angling the knife either to the left or the right.

| 
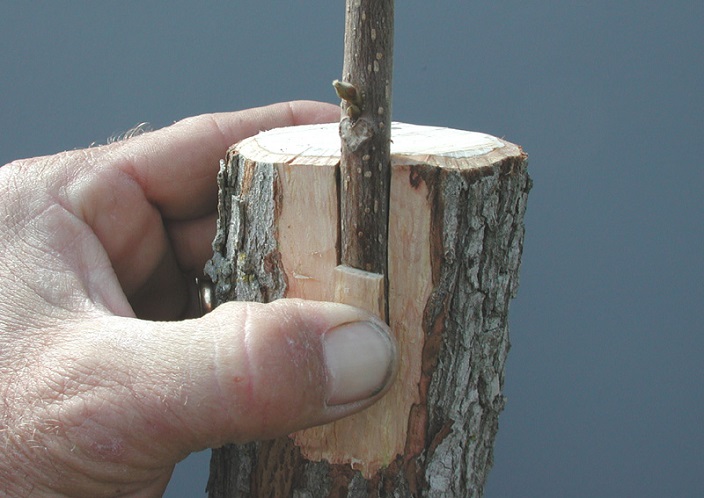
| Fig. 15
Making the left inlay cut
| Fig. 16
Opening the inlay for graft insertion
|
Upon
completion of the right inlay cut, do not allow the graft stick to move
as you reposition your left hand to make the left inlay cut. You may
have to hold the graft stick in place with your right hand as you
reposition your left hand. Bring the left hand around the back of the
stock to position just your fingertips on the graft stick. Then make
the second inlay cut on the left side of the graft stick, cutting
straight into the stock just as you did on the right side. If done
correctly, the two parallel inlay cuts will be exactly the same width
as the long cut section of the graft stick.
Open the bark flap
between the two parallel inlay cuts and pull it slightly away from the
stock. This may be facilitated by pricking it open with the point of
your knife. Slide the graft stick between the bark flap and the wood of
the stock. There should be no air space between the long cut of the
graft stick and the flat surface of the stock. As you insert the graft
stick, press the bark flap against it with your thumb to hold it firmly
in place. Apply firm but gentle downward pressure to the top of the
graft stick to force it into the inlay slot.

| 
| Fig. 17
Inlay graft properly positioned
| Fig. 18
Opposite view showing the slant cut
|
Push the graft stick into the inlay slot until the bottom of the slant
cut reaches the top of the stock. This exposed slant cut surface will
form the callus and new tissue which will help cover the top of the
stock and securely anchor the graft. Do not push the slant cut below
the top of the stock because that will separate the graft stick from
the flat wood, creating air space between the stock and scion. The top
half of the bark flap can be cut off so a nail can be placed directly
into the graft stick.

| 
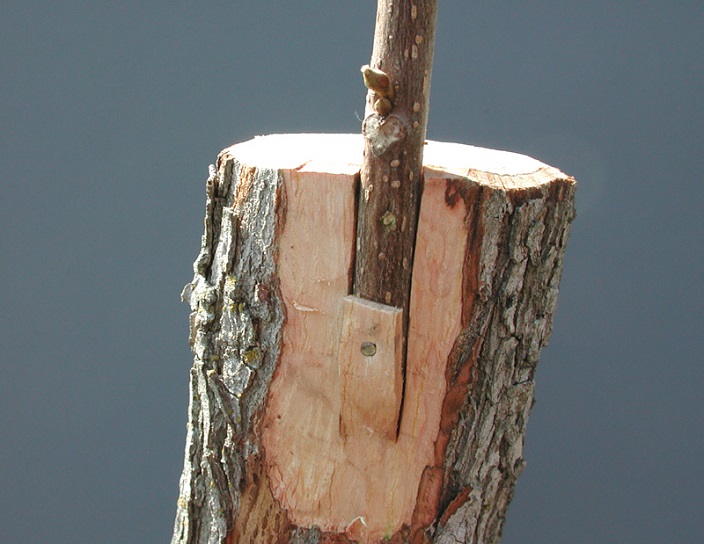
| Fig. 19
Inlay graft properly positioned
| Fig. 20
Aluminum foil in position
|
The
graft can be secured by any one of several methods. Eighteen gauge
3/4-inch nails, 5/8-inch flat-point staples (inserted parallel with the
graft stick), budding tape, floral tape and flagging tape have all been
successfully used. Two of the 18-gauge nails have been used in this
demonstration--one through the graft stick above the cut-off bark flap
and one through both the lower part of the bark flap and the graft
stick.
Tear a 12-inch square of aluminum foil from the middle of
one side halfway down to the center of the square. While such precision
is unnecessary, it may be helpful to fold the foil in half, then fold
it in half again. Upon unfolding the foil, there are four separate
folds from which you can choose to make this tear. Place the bottom of
the tear vertically directly under the lowest bud, then fold the bottom
half of the foil around the stock.
 | 
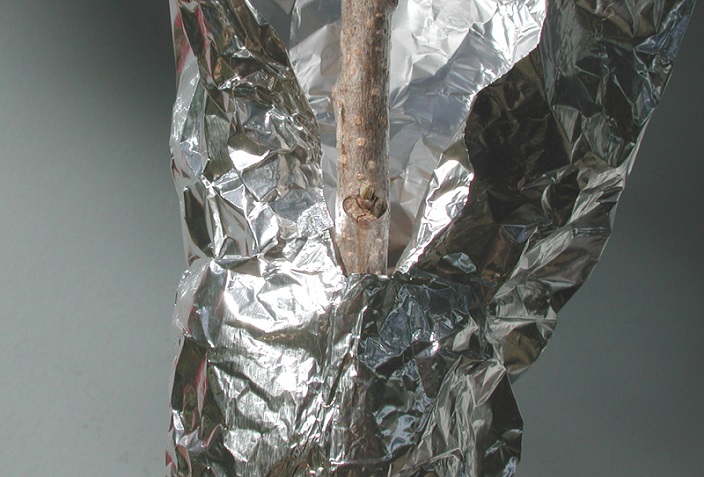
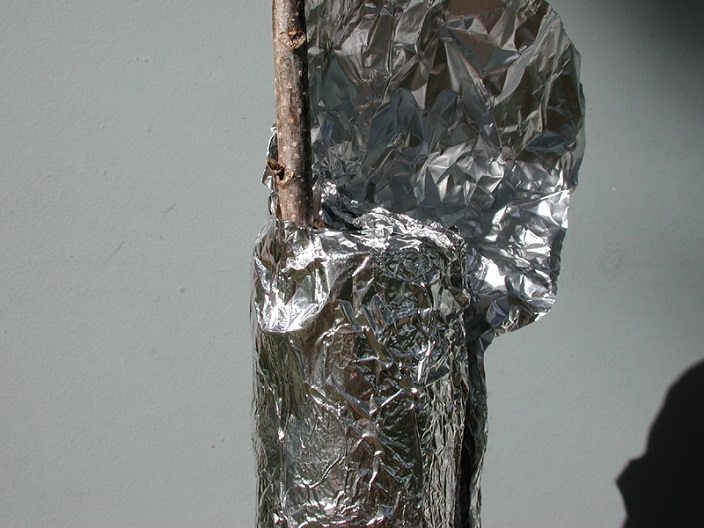
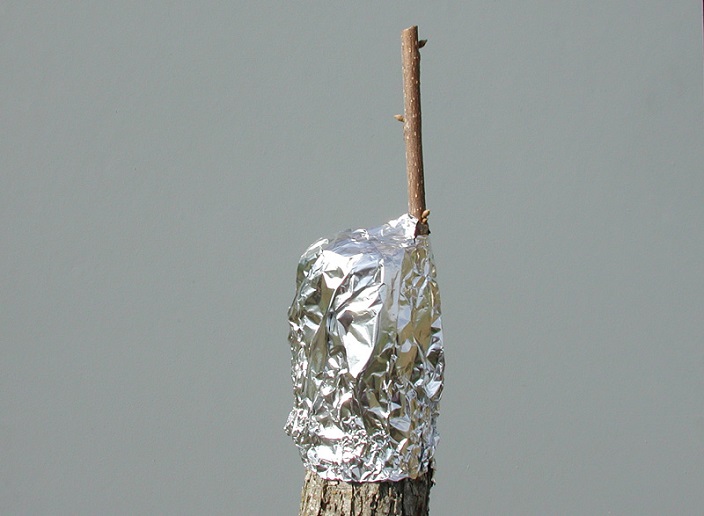
| Fig. 21
Folding the upper parts of the foil
| Fig. 22
Foil wrapping completed
|
Fold
each side of the divided part of the square over the cut surface of the
stock, being careful to cover all cut surfaces, including the slant cut
of the graft stick. Crimp the foil to form a loose mold around the
stock. Do not crimp the foil into the back side of the graft stick,
i.e., the slant cut area.

| 
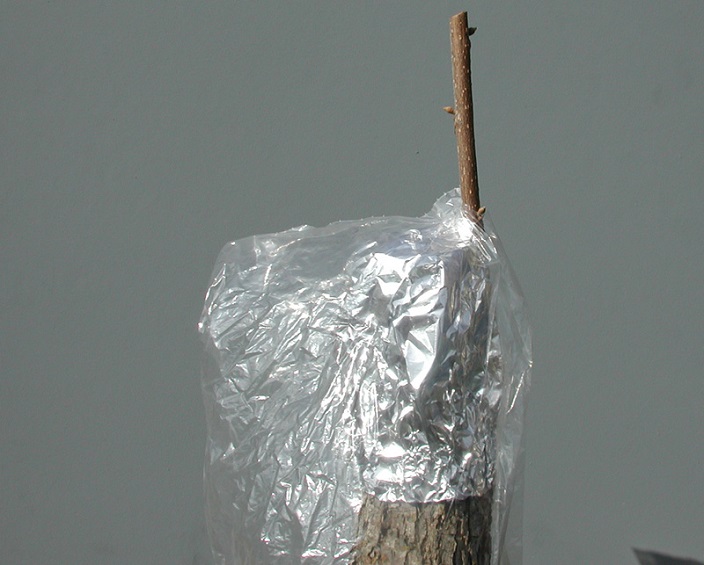
| Fig. 23
Bag in position over the graft
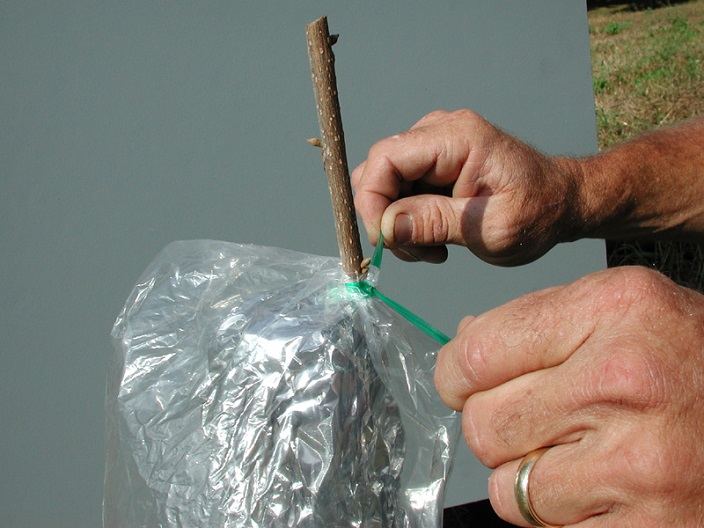
| Fig. 24
Tying the bag to the scion
|
Cut
off one corner of a pint or quart polyethylene bag. Slip the bag over
the graft stick, with the graft stick protruding through the cut
corner, and gently pull it down until the corner is positioned just
below the lowest bud and above the slant cut. Tie the cut corner of the
bag around the graft stick just below the lowest bud and above the
slant cut so that no air leak occurs. Use a rubber band, small rubber
strip or polyethylene tape so that the graft will not be girdled as it
grows. Tie the lower end of the bag around the foil-covered part of the
stock, i.e., the foil on the stock must extend below the bag. Make a
small puncture above the lower tie to allow excess water to drain out
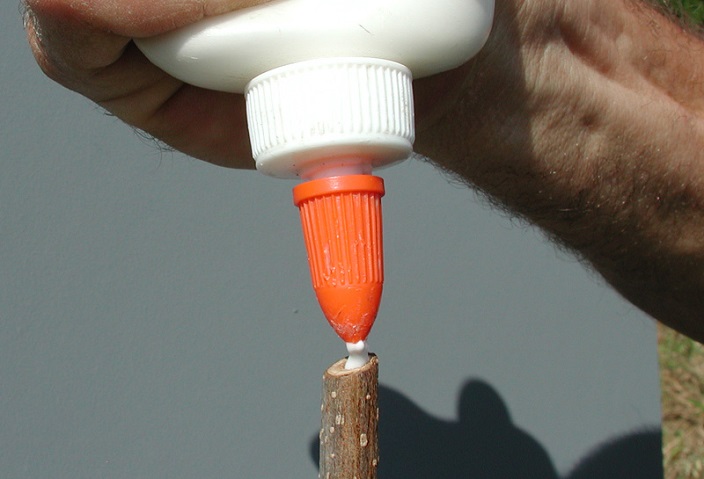
of the bag. Then, coat the cut surface of the top end of the graft
stick with household glue to prevent drying.

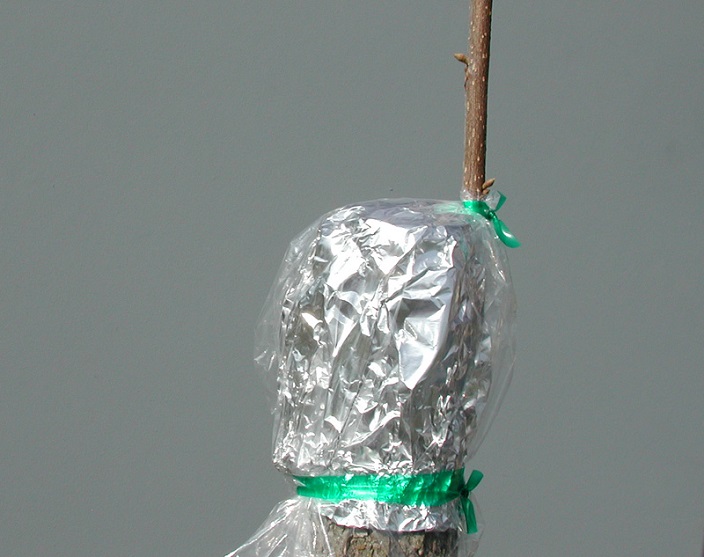
| 
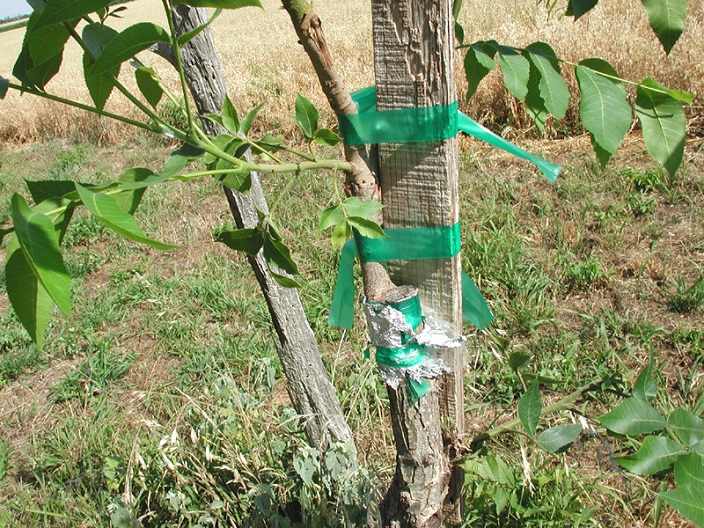
| Fig. 25
Completed inlay bark graft
| Fig. 26
Apply glue to the top of the scion
|

| 
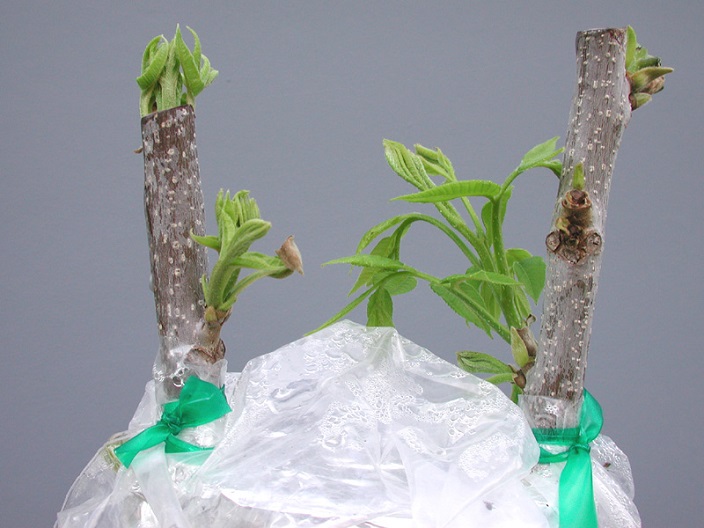
| Fig. 27
Initial growth of the scion buds
| Fig. 28
Note the callus formation on the cut stock
|
The
buds on the graft stick should begin to grow in 4 to 6 weeks. Remove
the polyethylene bag, foil and any tape when the new growth is over 6
inches long. Note the strong callus growth around the tree and graft
stick. As the new shoots grow, keep them pruned back to 24 inches to
prevent wind blowouts. If maximum growth of the graft is desired,
select the strongest shoot at 6 to 10 weeks and tie it to a brace to
prevent it from blowing out, removing the others. Otherwise, wait one
year before selecting the strongest shoot on the graft. Tip prune all
shoots which originate below the graft when they are 12 to 15 inches
long. After 2 or 3 years when at least three-fourths of the cut surface
of the stock is covered with new growth from the graft, remove all
shoots that originate below the graft.

| 
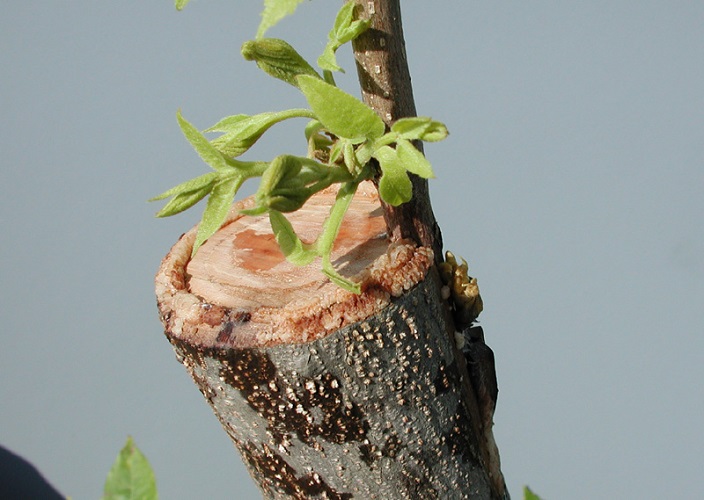
| Fig. 29
Partially healed inlay graft
| Fig. 30
Side view of partially healed inlay graft
|

| 
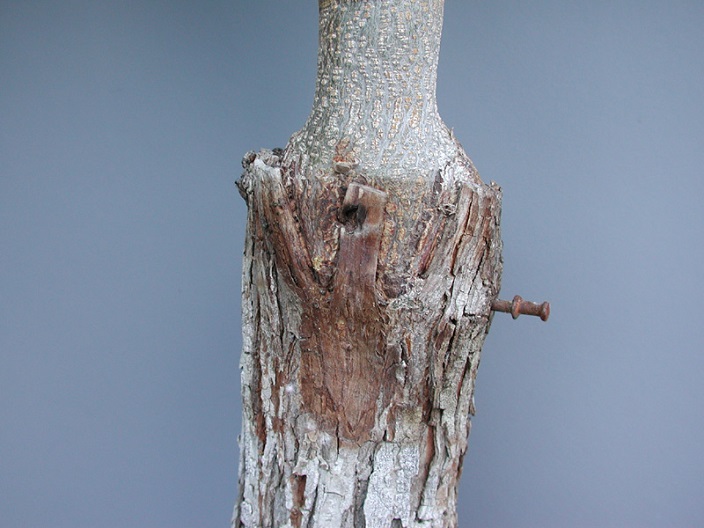
| Fig. 31
Scion shoot tied to a stake for support
| Fig. 32
Wind damage to a young inlay graft
|
The
graft is not totally safe until the entire wound area is healed over.
Growth of the graft is likely to be strong and vigorous, so wind damage
can result. In such cases, so long as there are buds above the graft,
it can be pruned back to strong shoots.
Publication from Aggie Horticulture®
The information, as it is presented on this Website, does not represent
an endorsement
by the State of Texas or any State agency.
Back to
Grafting Techniques Page
|
Publication from Aggie Horticulture®
|